Introduction
I run a few Minecraft servers for my Discord and utilize a plugin called Dynmap. This plugin allows players to view the world map in their browser and see where other players are at. Dynmap takes the minecraft world file and renders tiles for the web app and stores them on disk. I recently discovered that Dynmap “supports” writing its map render files to a mysql database which I thought was pretty cool. This removes the storage burden on the minecraft server host and frees up disk IO. This will be a quick tutorial on setting up a mysql database for Dynmap and some of the hoops you have to jump through for getting it to work with Fabric.
1. We Need A Database
I will try not to focus on the 1000 different ways you can setup a database. Ideally this database should be on a seperate virtual or physical host from your Minecraft server. I have mine setup as docker containers with persistent volumes. I find this the easiest solution for my setup but your needs could vary. You can launch a mysql container with the following one liner. Here we will pass in the dynmap user, password, and initial database name.
docker run --name dynmapdatabase -d --restart=always -v $PWD/mysql:/var/lib/mysql -e MYSQL_DATABASE=dynmap -e MYSQL_ROOT_PASSWORD=redacted -e MYSQL_USER=dynmap -e MYSQL_PASSWORD=dynmapuserpassword -p 3306:3306 mysql:5.7
Make sure to open port 3306 in your firewall. The database can now be accessed at the ip address of the host for your docker daemon on port 3306.
2. Dynmap Configuration (Bukkit, Spigot, Paper)
If you don’t have Dynmap setup at this point I suggest going ahead and doing that. Startup your minecraft server so Dynmap can generate its config files. In your Dynmap folder we will be modifying configuration.txt. Open this file and find the storage section. Here we will comment out the line type: filetree and uncomment everything from type: mysql to prefix: “”. Next just fill in the information about your database you launched before. I have provide my config below for an example.
storage:
  # Filetree storage (standard tree of image files for maps)
  #type: filetree
  # SQLite db for map storage (uses dbfile as storage location)
  #type: sqlite
  #dbfile: dynmap.db
  # MySQL DB for map storage (at 'hostname':'port' with flags "flags" in database 'database' using user 'userid' password 'password' and table prefix 'prefix')
  type: mysql
  hostname: 192.168.1.137
  port: 3306
  database: dynmap
  userid: dynmap
  password: dynmapuserpassword
  prefix: ""
  #flags: "?allowReconnect=true"
Save this file and restart your minecraft server. If there are no errors in the startup log you can run dynmap fullrender world to start a new render job to your new database!
3. Fabric And Dependency Hell
Now if you’re like me and run a modded fabric server you likely ran into the error No suitable driver found for jdbc:mysql dynmap on startup. This is because fabric does not come packaged with a MySQL connector jar thing (Idk how Java works it scares me). Fortunately thanks to user “Altirix” for opening an issue on the Dynmap git repo AND posting a solution, we can fix this fairly easily.
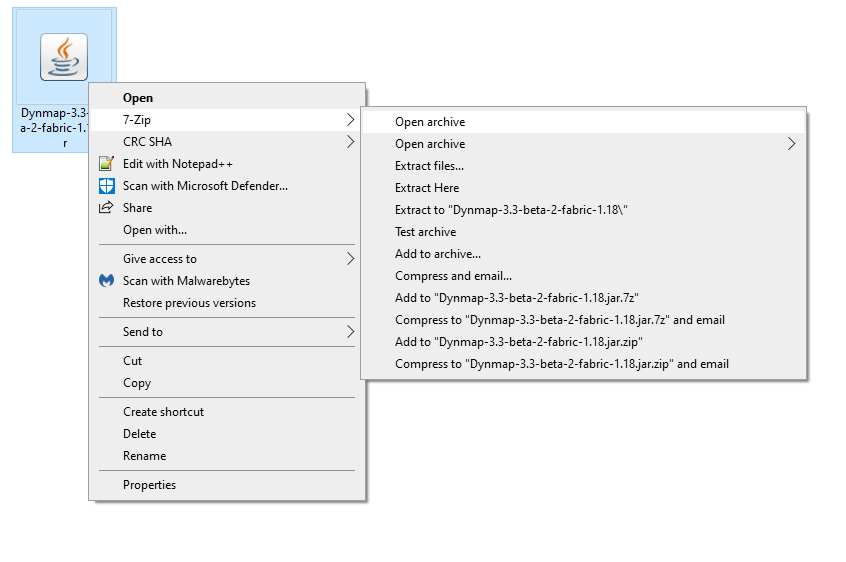
First we need to obtain a mysql connector jar. This can be found here: https://repo1.maven.org/maven2/mysql/mysql-connector-java/8.0.21/mysql-connector-java-8.0.21.jar. Next you need the Dynmap jar file for Fabric. For this tutorial I am using Dynmap-3.3-beta-2-fabric-1.18.jar. Once you have both of these files open them up in archive mode using 7zip.
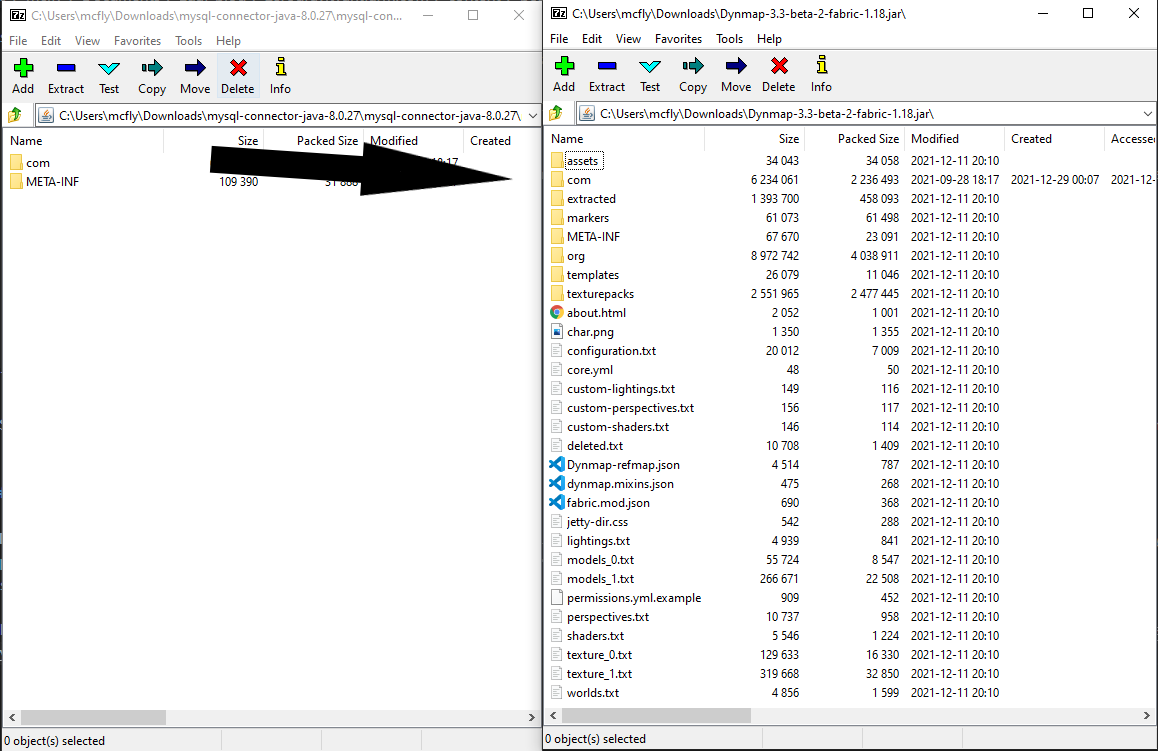
Next drag the COM folder from the mysql connector jar over to the dynmap archive. In the screenshot I have already copied mine over.
After, you can close both windows then upload your new Dynmap jar file to your fabric server. Following the same steps from earlier to setup the database and connection details.
4. Multiple Dynmap Instances
If you like you can setup several Dynmap instances to utilize the same database server. First you need to log into your mysql server using a sql client then create a new database.
CREATE DATABASE dynmap2;
Next we need to allow our dynmap user permissions to use this database.
GRANT ALL PRIVILEGES ON dynmap2.* TO 'dynmap'@'%' IDENTIFIED by 'dynmapuserpassword';
The Dynmap config on your second server will be exactly the same as the first except the database name will be the new database you created. Have fun!
comments powered by Disqus