Lane Detection
An important component of our self driving car architecture is the ability to detect lanes and road lines on the road. We could probably train a convolutional nueral network to drive without object detection or lane detection but our dataset would likely have to be massive. Surely it can’t be that difficult right? Right?….
Hough Transform
Ideally we can detect the lines on the road without machine learning. I mean, we would have to do double inference (foreshadowing) and surely that wouldnt be fast. Enter the Hough Transform. The Hough Transform is some fancy math that can detect shapes in images. OpenCV has some built in tools for performing Hough Transforms so lets test it out.
![]()
First attempts are promising, lets continue adjusting some parameters…
![]()
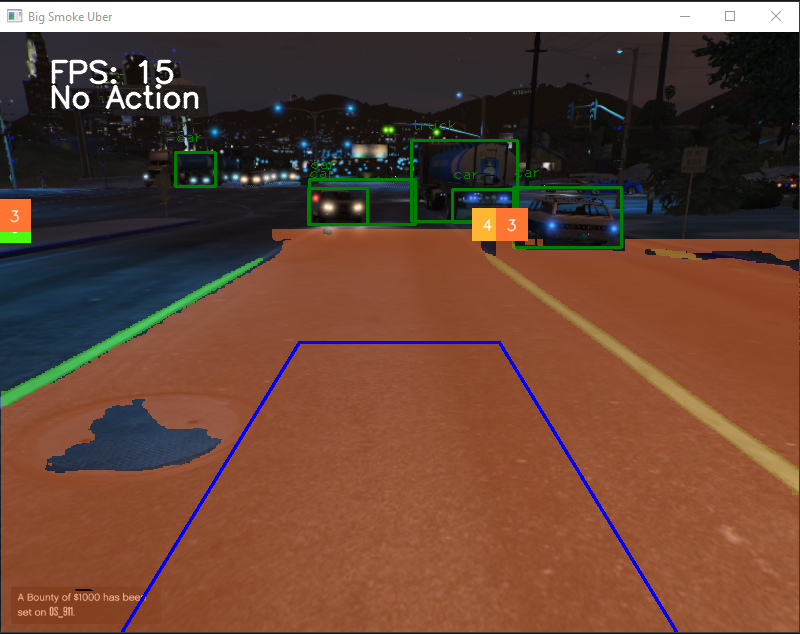
Its working great . As you can see, I could absolutely not get an accurate detection of road lines. The problem is GTA’s environment is so dynamic (in a good way) with a TON of different road types and varying qualities in addition to a day night cycle and weather. Looks like we’re training a custom Yolo11 model.
We Need a Data Set
I am not an expert in AI or computer vision in any way so most of the parameters or settings I based my training data on are from existing datasets I have found online. Generally it seems the bigger and diverse your dataset is the better your model will perform but there are some tricks to get quick results I will talk about later. First off we need a way to collect several sample images of GTA’s roads. I asked llama3.1 to write me a quick script for this and it did a great job. Essentially we run around in first person view and the script takes a picture every 3 seconds. After a few hours we have a dataset including samples from various times of day and different types of road and road quality.
import cv2
import numpy
import time
import mss


# Area of the screen to capture (AKA the game window)
monitor = {"top": 240, "left": 560, "width": 800, "height": 600}

counter = 0
with mss.mss() as sct:

    # Capture loop
    while "Screen capturing":
        last_time = time.time()

        # Get raw pixels from the screen, save it to a Numpy array
        img = numpy.array(sct.grab(monitor))

        # Convert to RGB color space
        img = cv2.cvtColor(img, cv2.COLOR_BGR2RGB)

        # Write image to file with unique filename
        cv2.imwrite('gta_lane_training/road/images/road' + str(counter) + '.PNG', img)

        print("Captured image " + str(counter))
        counter += 1

        time.sleep(3)

        if cv2.waitKey(25) & 0xFF == ord("q"):
            cv2.destroyAllWindows()
            break
Annotation For Segmentation
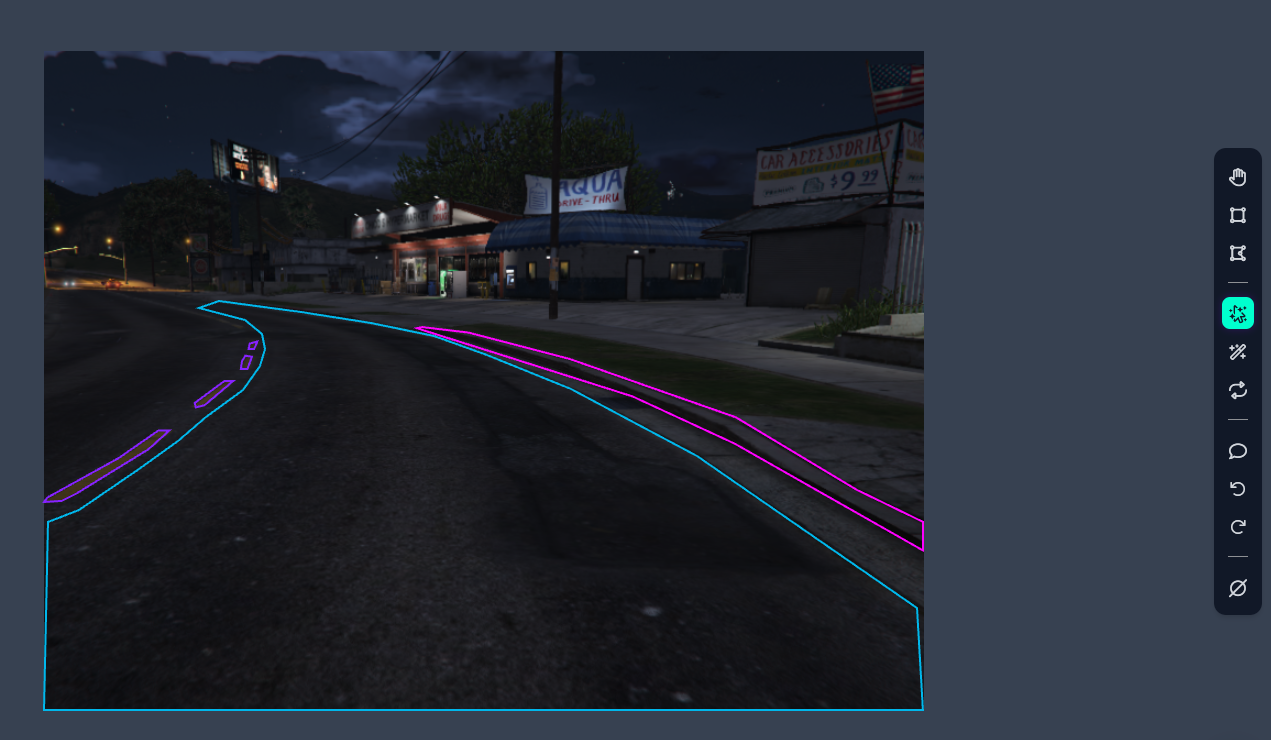
The next step in training a custom Yolo11 model is annotating our data. This is by far the most tedious, soul crushing part of this whole project. For every image we will have to highlight each object or class we want to detect and segment. Thankfully RoboFlow’s free annotation tool makes this as easy as possible (I am not sponsored nor have I paid for their service). In my case, I wanted to detect a primary lane or the active lane we’re driving in and any other possible lanes near us. Additionally I wanted to detect road lines and curbs. This is what an annotated image looks like.
I annotated 300 images and threw in the towel from boredom. Roboflow lets us export our dataset in various formats and select our training vs test data ratio. We can then download our dataset for local training.
Training, which size YOLO11? (n, s, m, l, xl)
Now we have a dataset for our custom object detection, how do we train Yolo11 for local inference? There are several things we must decided first. Since Yolo11 comes in several different parameter sizes, what size Yolo11 do we use? In our particular use case, inference speed is important so I opted for Yolo11 nano but something that will require testing of model types for acceptible accuracy or speed tradeoffs. Next we will need a data.yaml config for training. This will contain relative file paths, class count, and class types. Classes are just the names of the objects we want to detect and segment. My data.yaml can be found below as a sample.
train: C:\Users\{}}\Downloads\GTAv-Road.v3i.yolov11\train\images
val: C:\Users\{}\Downloads\GTAv-Road.v3i.yolov11\valid\images
test: C:\Users\{}\Downloads\GTAv-Road.v3i.yolov11\test\images

nc: 6
names: ['curb', 'divider', 'divider-solid', 'lane-1', 'lane-2', 'lane-3']
What augmentations, epochs, batch size?
We’re very close to training our first model but there are some settings we have to decide on first. Most important of these is what augmentations we want to apply to our training data images. These augmentations consist of color shifts, image rotating, stretching, and overlaying. This is effectively artificial variance applied to our training data to make our model a little more robust. We can edit these settings individually or we can apply a augmentation “template”. Yolo11 supports auto augmentations, as I dont know much about setting augmentations this is what I opted for. Online it seems 300 epochs are a standard starting point for training a custom data set so that is what I went with. yolo cli by default will stop training after 100 epochs if no performance improvements are detected. Next, batch size determines the number or images we process at once. This can be set to -1 to utilize roughly 60% of your graphics card vram. I am training on a 3090 so this also seemed like a acceptible default. Configuring device to 0 will force yolo to use the first gpu detected assuming CUDA toolkit is installed.
Lets train!
yolo task=segment mode=train model=yolo11n-seg.pt data="data.yaml" epochs=300 imgsz=640 plots=true batch=-1 auto_augment=autoaugment device=0
The Numbers Mason…
After about 25 minutes training was completed. Before we load up our new weights, how do we know how well the training process went? In our case there are a few important values to look at.
seg_loss dropped substantially from the starting epoch. This value predicts how well the model will find the shape of the object we’re wanting to detect. Ideally this should be as low as possible. Next, mAP50 increased across the board. This is the predicted overall performance. It is a little on the low side based on other custom models I have seen but we will see how it performs in real testing scenario.


The Proof Is In The Segmentation Pudding
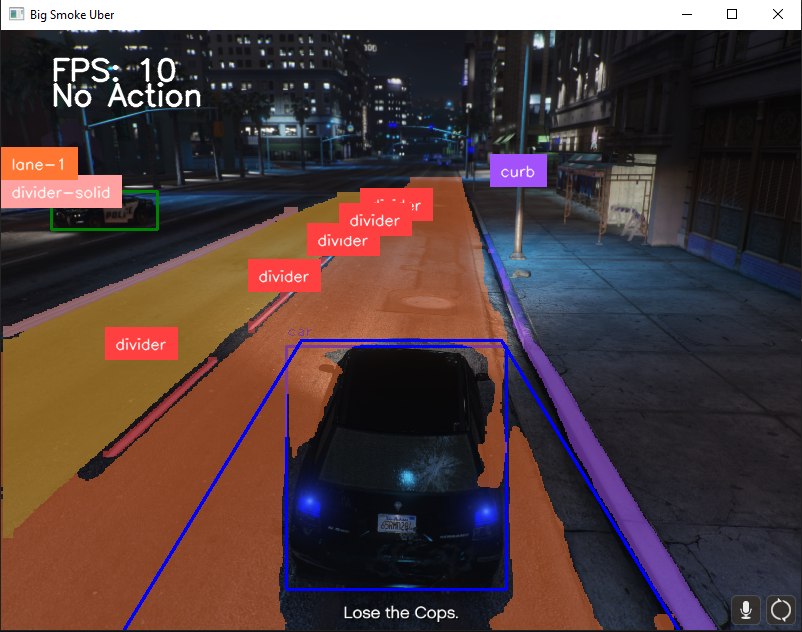
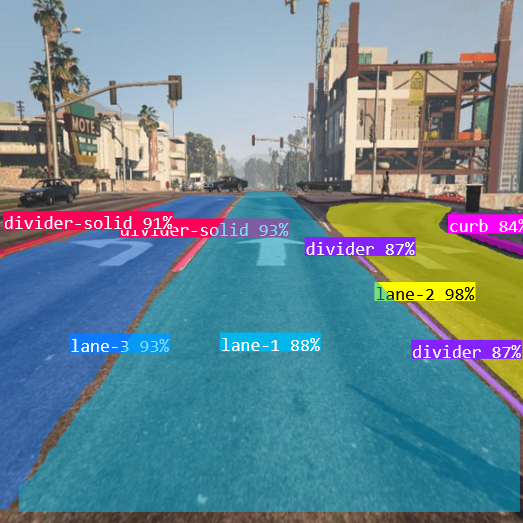
With just a few lines of code we can easily add our model to our existing object detection script. Performance wise Yolo11 object detection is very fast at about an average 1.6ms for object inference. Segmentation inference on our custom model is much slower at 10-15ms. All things considered we can run inference at almost a 60 frames per second. At 300 images dataset the model performs very well in most scenarios. Intersections appear to be under represented as it struggles to determine valid road space. Otherwise I am very pleased with how well lane and feature segmentation is performing. I think we can finally train a driving AI with this.
What’s next?
Now we have functioning and maybe even good lane detection we can look at training a convolutional neural network on driving. The next components will consist of collecting training data for our CNN and a custom data loader. Thank you for reading! As always please find the latest code on github and keep an eye out for the next update!
Repository: https://github.com/Sphyrna-029/big-smoke-uber
