Introduction
First post of 2021! So its been a while since the last post on the blog and I’ve started on a few new projects. One of them is something I’ve wanted to do since I was a kid and that is build a proper ROV. With the advent of the raspberry pi and easy access to code the past few years this project was something that seemed more feasible than before and I decided to dive in head first (pun intended). Most of the project is DIY but a few of the important waterproof parts were sourced from blue robotics. They’re a great company and I suggest you check them out!
The Frame
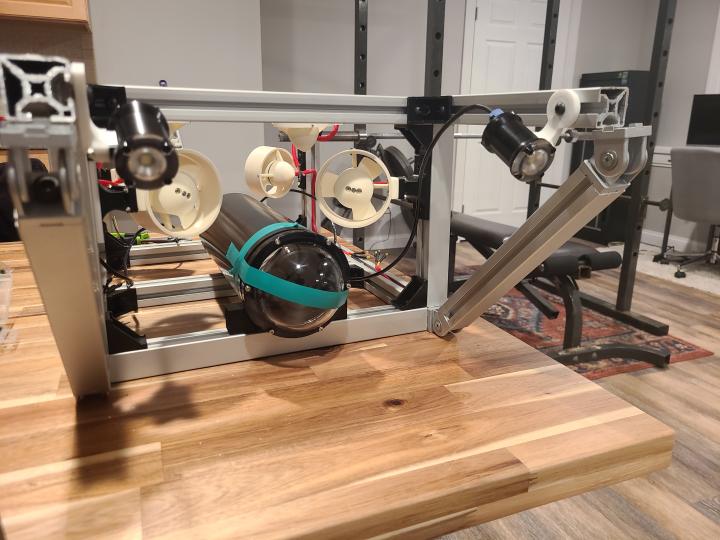
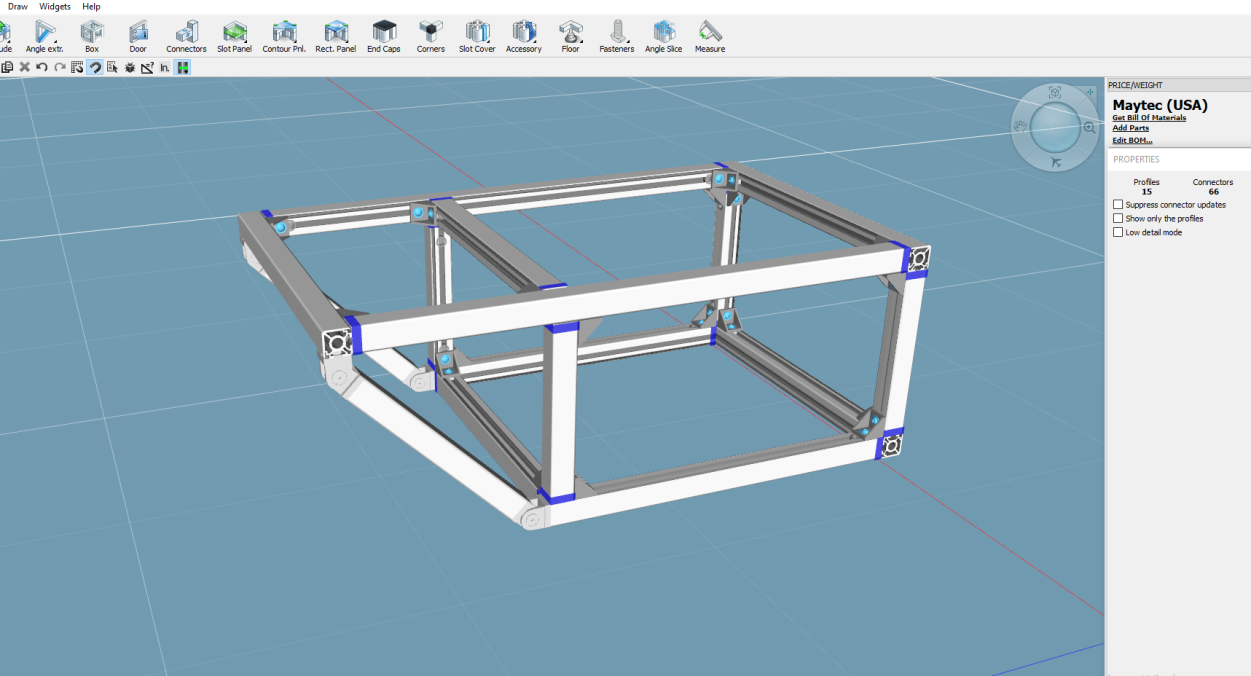
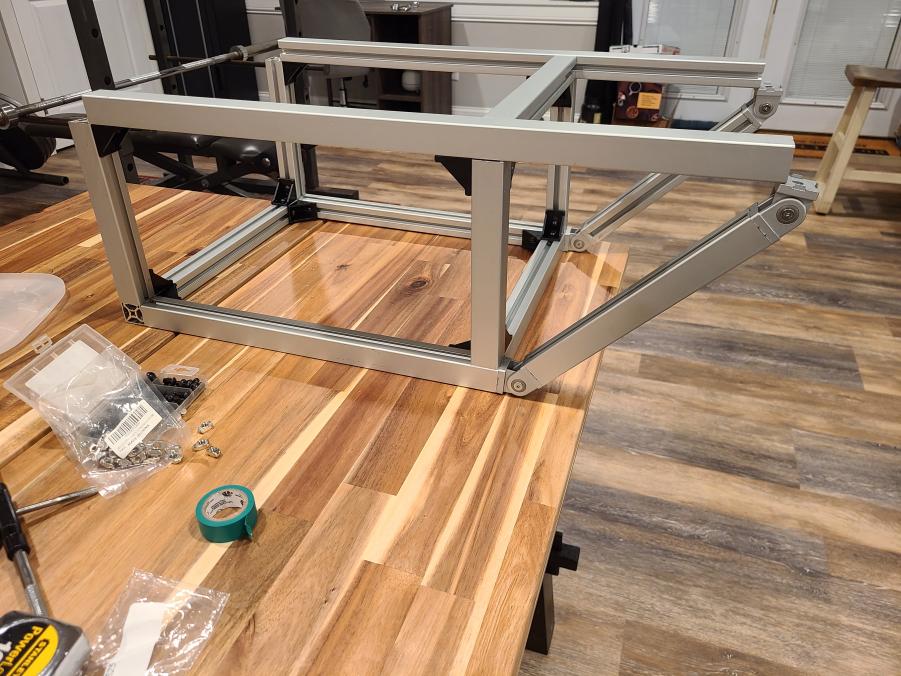
Our ROV is going to need a frame, and what better else material to build one out of than 8020 extruded aluminum. I am not very savy with CAD programs but I did find a software (Maytech) that lets you design structures in extruded aluminum. For the frame I chose 3030 rail with a double smooth side. I figured this would give the frame a more polished look but still allow for plenty of mounting options on the inside. This way I can try a few different motor configurations without much commitment.
Propulsion
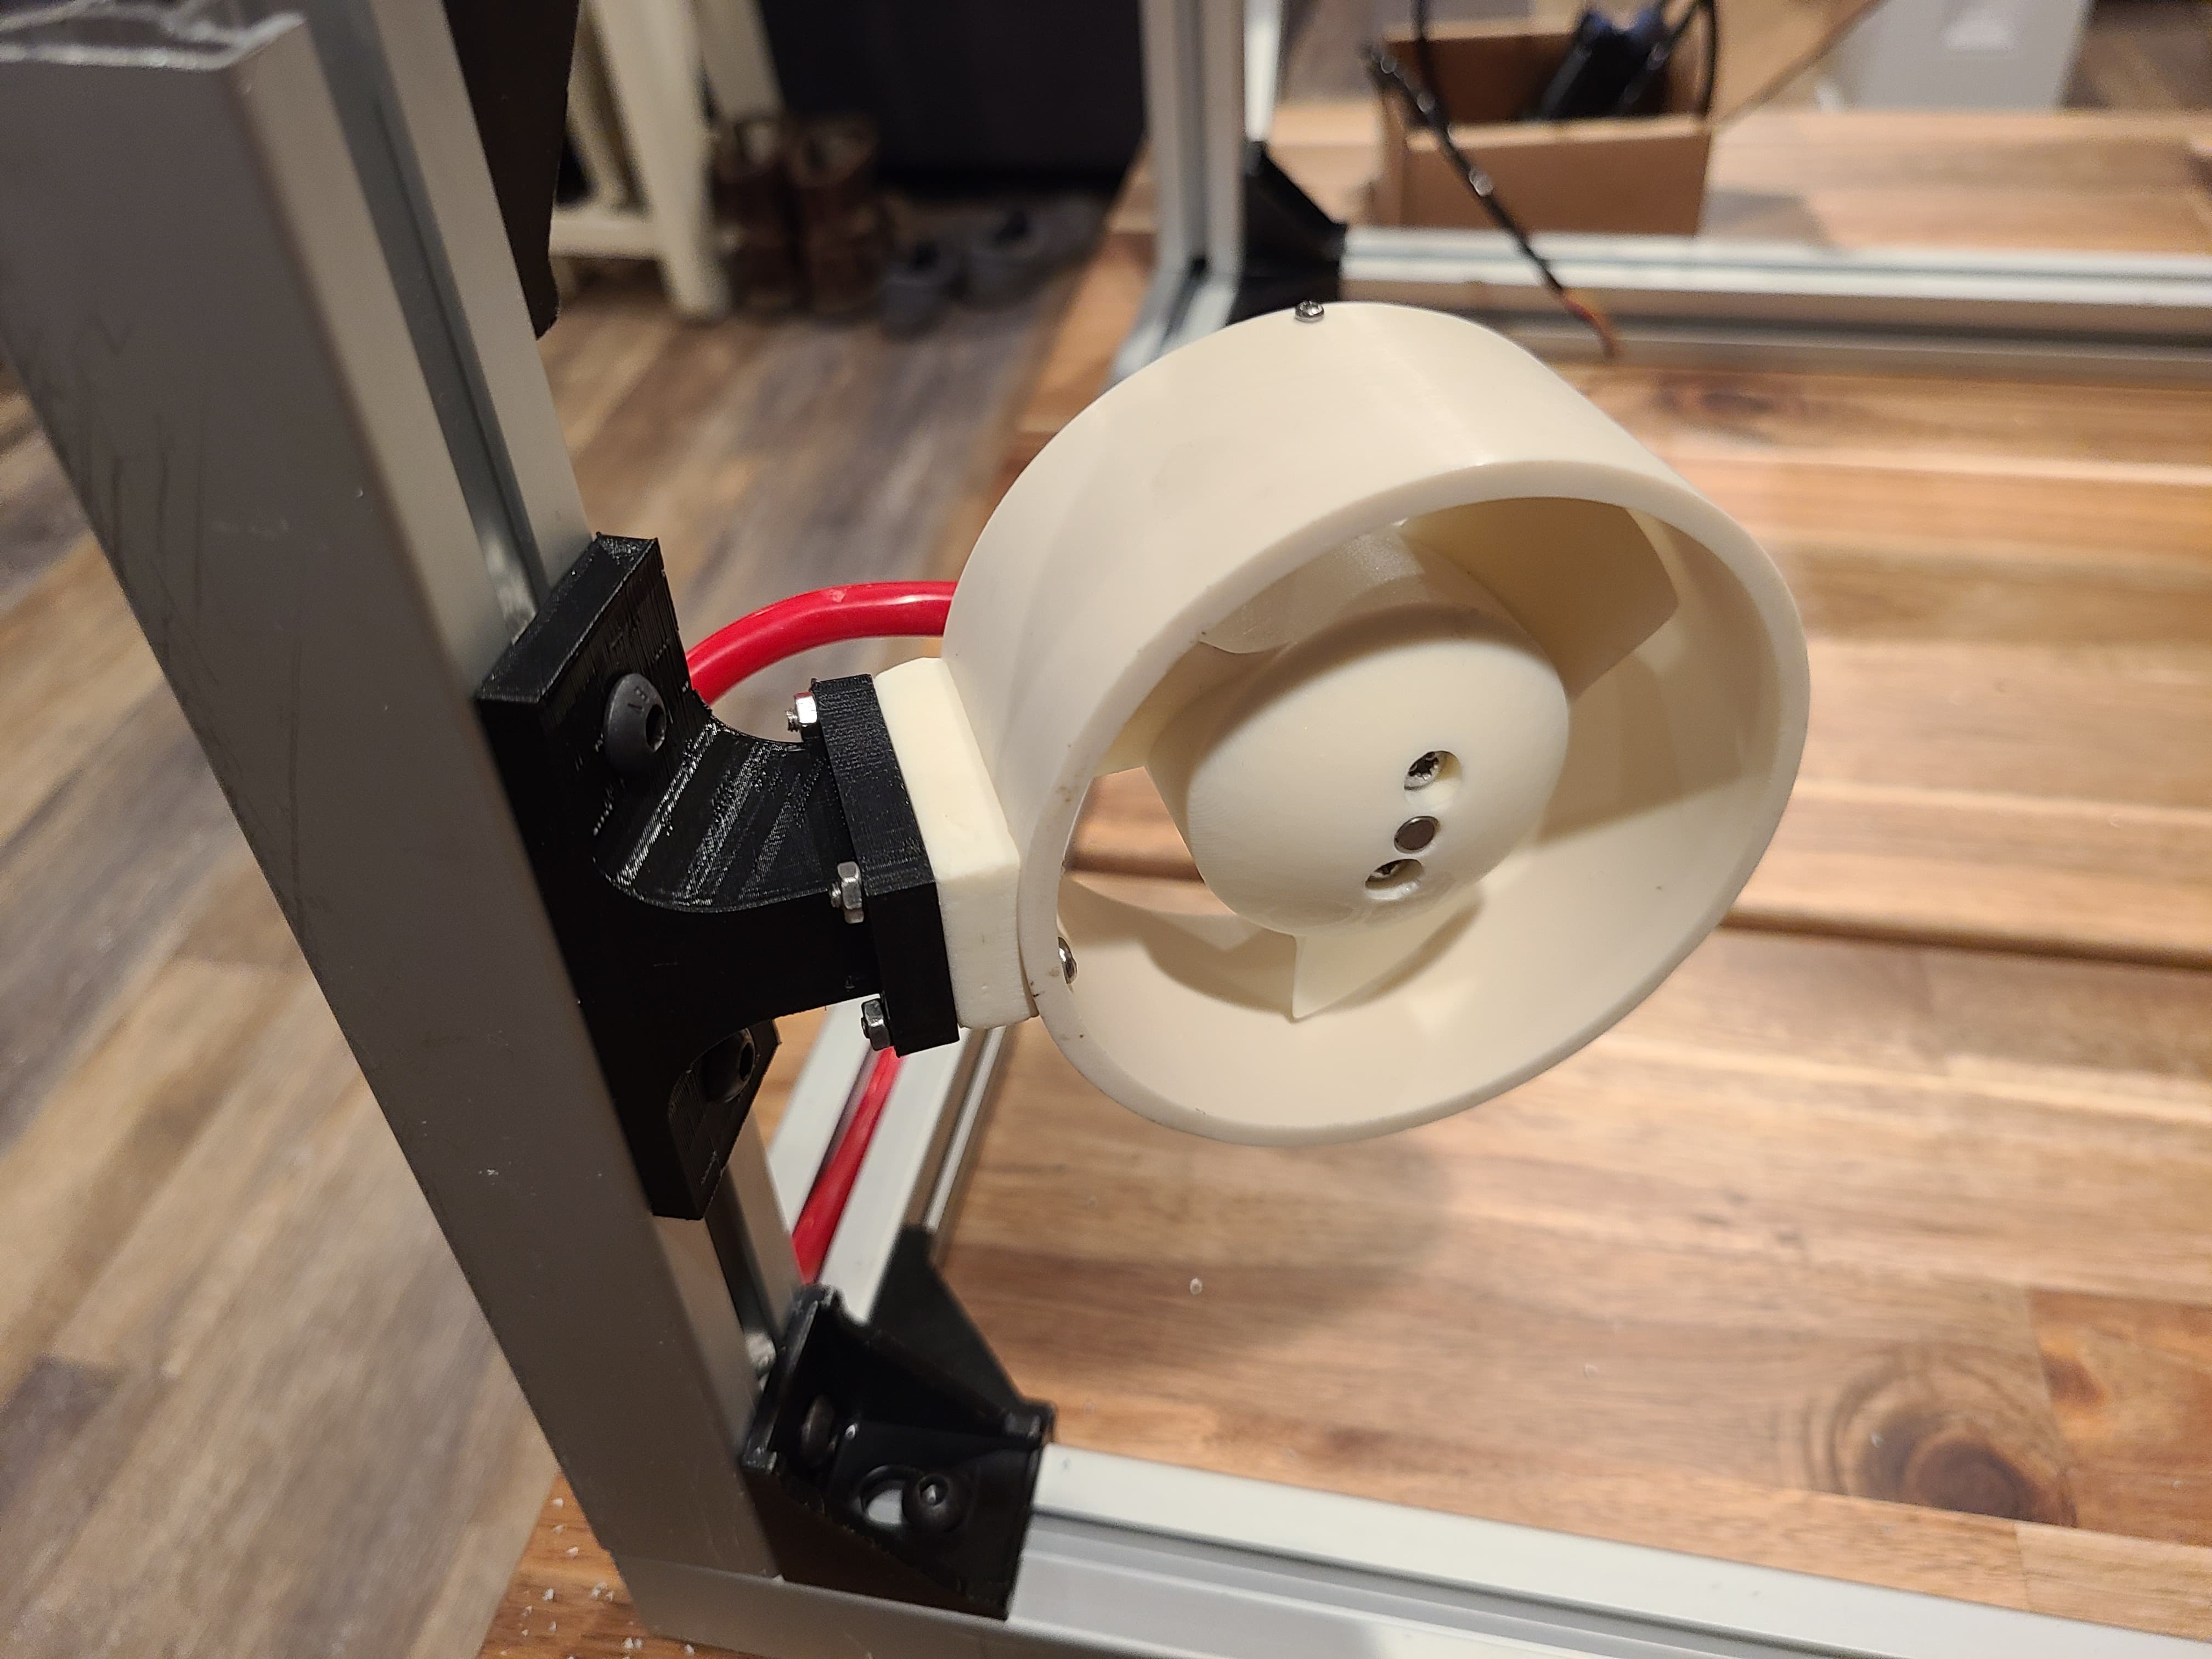
For motors I found some cheap thrusters on amazon that on close inspection seem to be refurbished drone motors. I am optimistic about these but for the price I will not be disapointed if some fail. I’ve opted for a 6 motor thrust vectored setup.
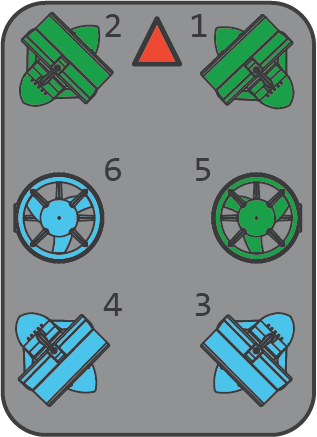
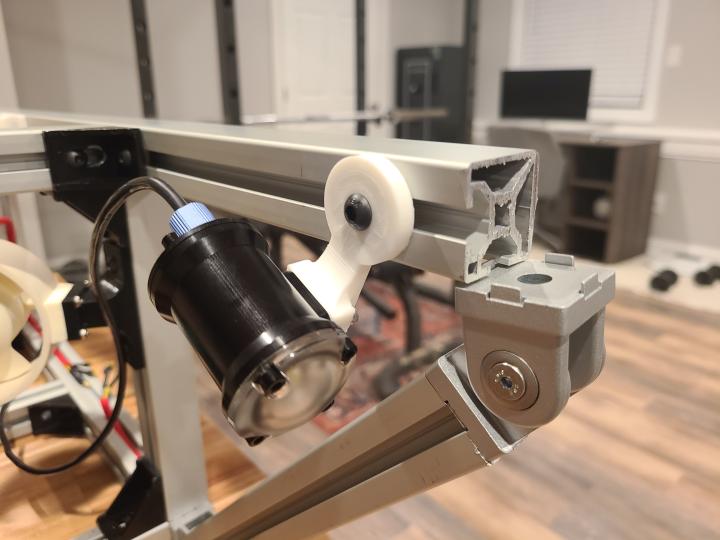
This will allow for full 3 axis movement and yaw motion. This setup is also a pre configured motor configuration in the ardu sub software. From here I 3d printed some motor mounts for the amazon thrusters and they bolt nicely to the 8020 rail.
Pressure Vessels And Lights
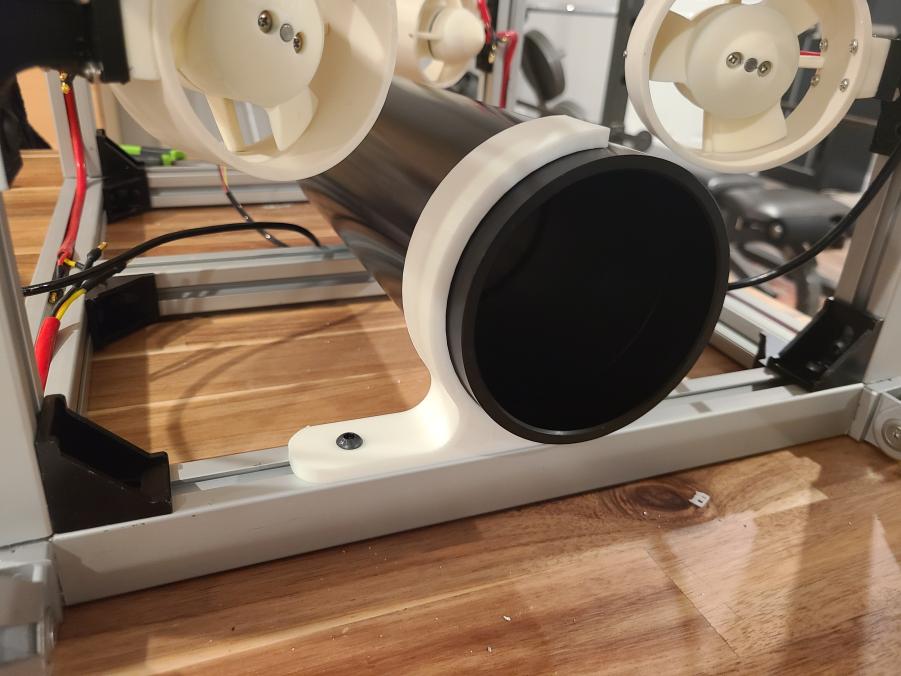
For housing the electronics I opted for blue robotic’s aluminum 4 inch housing. These housings are rated for 1300ft and I was willing to spend a little more money for the peace of mind. Just like the motors I 3d printed some mounts for the tube and it bolts to the bottom of the frame.
Next up was addressing the lights. I purchased 2 Subsea Lumen lights from Blue Robotics and 3d printed some mounts for them as well. They fit snuggly under the front crossbar and should be protected.
Assembly
Everything fit together quite well with room to spare. The next thing to address is a source of power and setting up ardu sub. I am really excited with how this project is turning out so far. Stay tuned for part 2 where we will go over designing and building a battery from scratch for the ROV.