Introduction
Around sometime in 2019 I was doing a lot of projects with the raspberry pi and got to thinking to myself; how hard would it be to make my own from scratch? I considered myself fairly competent with electrical theory (for a hobbyist) and had some experience in pcb fabrication. So I got to researching if any others had attempted similar feats. I quickly stummbled upon George Hiulliards linux powered business card and became so inspired I decided to give it a go myself (His write up can be found here https://www.thirtythreeforty.net/posts/2019/12/my-business-card-runs-linux/).
The Amazing SoC
For those not familiar with what a SoC (System on Chip) is, it is basically a all in one computer in a tiny singular chip. They can contain the processor, ram, flash, gpu, all in one silicon package. This makes designing a host PCB for the system much more simple compared to a traditional computer where the components are spread out across the substrate. For example, copper traces for a memory bus between the ram and cpu must be very precise lengths to prevent timing issues. With a SOC, all of this is packaged in one place and the burden is alleviated from the designer. So theoretically all we have to do is design a circuit for clean power and run some pins for outputs right?…
Death By A Thousand Vias v0.1
I was looking at some open source SBCs(Single Board Computers) online and found one called the BlueberryPi by a gentlemen named Marcel Thürmer. His board was built on the AllWinnerV3s SoC and was very well documented. After studying his board and the V3s documentation for some time(and finding a source for the elusive V3s), eventually I had my first board layout completed.

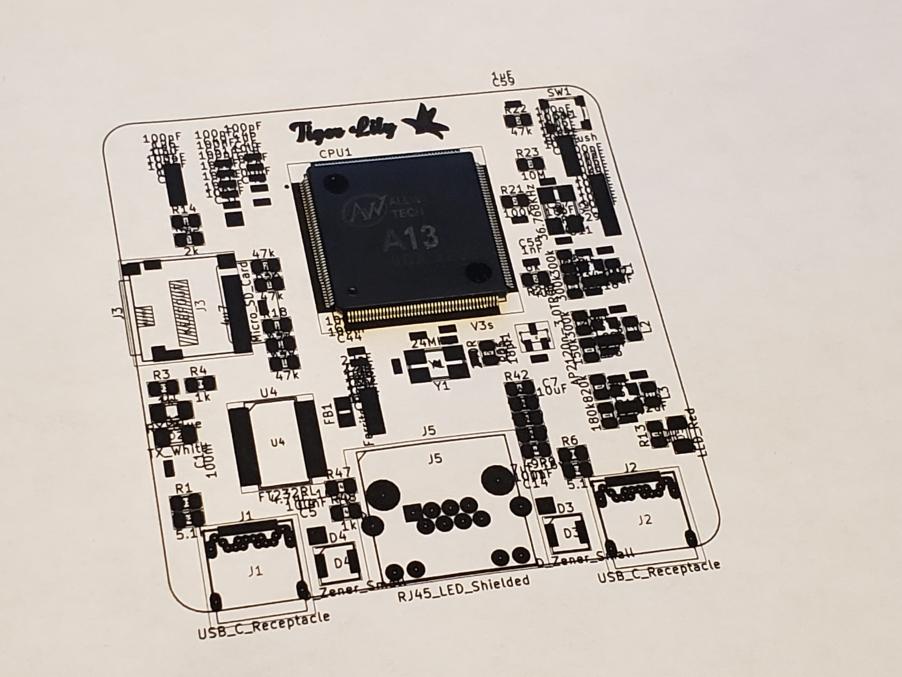
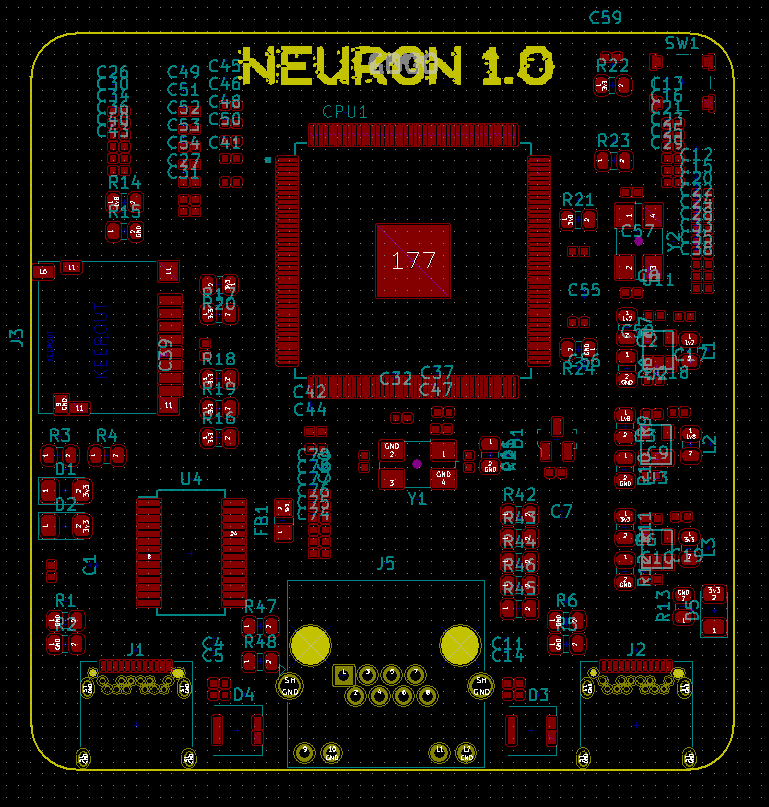
Admitingly I bit off more than I could chew with this design. It was way too much for a single layer board of this size. The design consisted of the V3s, two USB type C ports, 10⁄100 Ethernet, and a SD card slot. I opted for a FT232RL for usb communication. True USB type C will auto negotiate power needs and is a really cool protocol. I might do a seperate post on just USB Type C. After fighting with the auto router for hours I realised this wasn’t going to work and got back to the drawing board.
Less Is More v0.2
It took me longer than I would like to admit to learn that the auto router is not a silver bullet solution for mapping traces in Eagle. I decided to ditch all of the fancy components and just wire up the V3s and power. This arrived at a messy yet completed board. The Tiger Lily SBC was born.
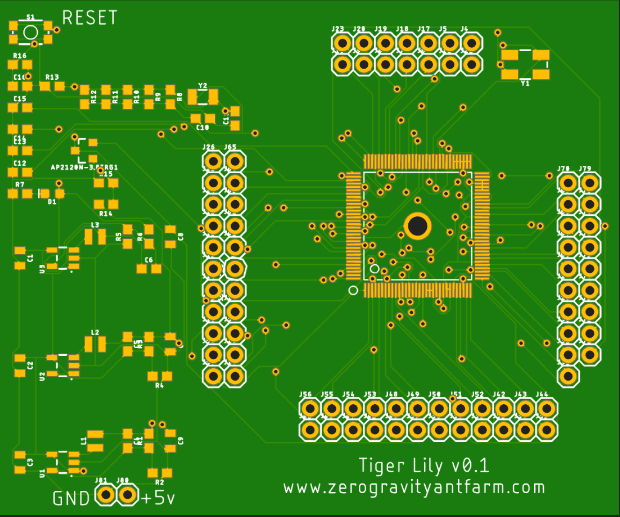
From here I iterated on the progress made and managed to clean up the design quite a bit. I had aspirations of eventually adding more supporting components and connectors but I was content with being able to prototype everything off of headers on the board. I sent this design over to oshpark and after a few weeks the boards arrived in the mail.
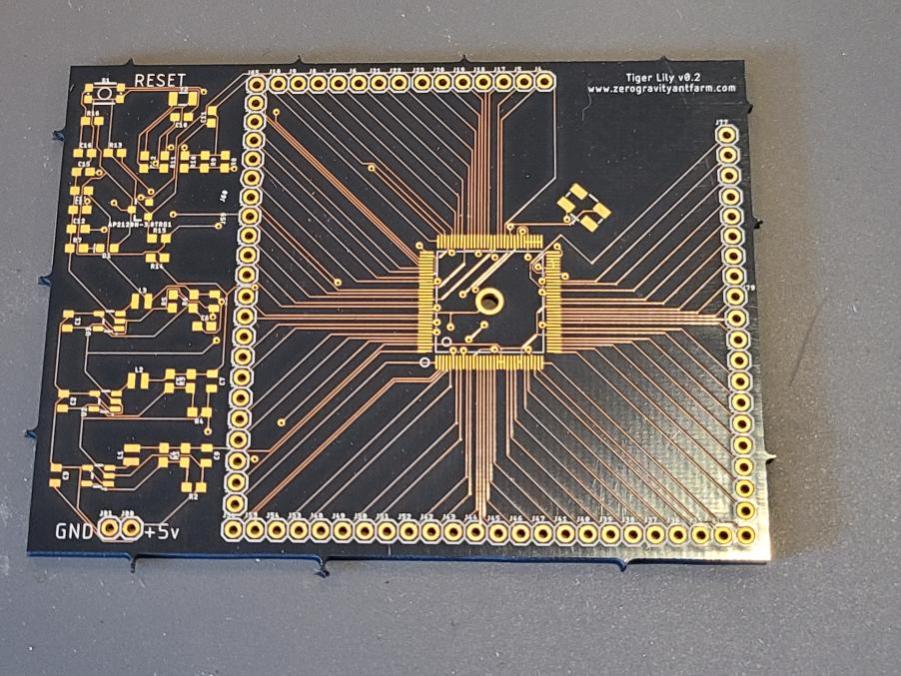
The quality on these boards was amazing and the gold on black finish looks great. Oshpark is a little on the pricey side but they do quality work and are also based in the US.
V0.3?
Unfortunately this is where the project stopped. I took a break from working on everything and before I knew it two years had passed by and the V3s is now obsolete. I absolutely would love to pick up this project again and utilize a more modern SOC and hardware. This was a great learning experience and as steep as a learning curve as it was I learned so much. Hopefully my failures will inspire someone else to make venture out of their comfort zone and make something cool. As always, thanks for reading!